Easily use complex geometry nodes in Blender python scripts
25 February, 2026
Blender geometry nodes are a very powerful tool. They make it easy to both build and execute complicated geometry operations.
When developing Blender python scripts, however, they are often tedious to use.
Here I will show you one way to use them, and then a way to make them much easier to use.
Crash course about the geometry node API in Python
Geometry nodes are just a type of modifier, that internally have a "node tree"
bpy.ops.object.modifier_add(type="NODES")
bpy.ops.node.new_geometry_node_group_assign()
modifier = target_object.modifiers[-1]
node_tree: bpy.types.GeometryNodeTree = modifier.node_group
This Node tree is just a graph, it has nodes and links.
nodes = node_tree.nodes
links = node_tree.links
The tree needs an input and output node at a minimum.
nodes.clear()
group_input = nodes.new(type="NodeGroupInput")
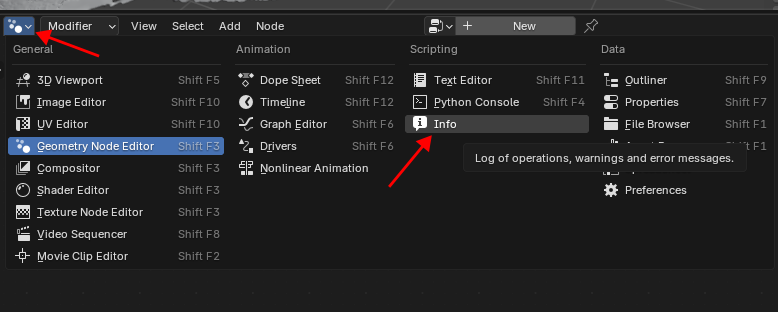
group_output = nodes.new(type="NodeGroupOutput")Now you can add whatever nodes you want in the "middle" so to speak. The node names, to the best of my knowledge, are not properly documented anywhere. Therefore, the best way to get the name is to open the info panel:
And then once you add a node, it will show the name of the "type" here:

This will also show you what the indexes of each of inputs and outputs are for a node (which is not always intuitive!).
For example the Vector Math node:

When in scale mode, index 0 represents the input vector, while index 3 stores the "Scale factor". (Indexes 1 and 2 are there, but are not shown, as they are not used in Scale mode).
Using both the name and the indexes of the inputs and outputs, you can then join them together, by adding links:
mesh_to_volume = nodes.new("GeometryNodeMeshToVolume")
mesh_to_volume.resolution_mode = "VOXEL_SIZE"
mesh_to_volume.inputs[2].default_value = 0.5  # Voxel size
mesh_to_volume.inputs[1].default_value = 1  # Density
links.new(set_position.outputs["Geometry"], mesh_to_volume.inputs["Mesh"])
Then assuming you did everything right, then congratulations! You have constructed a Geometry node tree purely via code.
Blender file append
Blender has a useful feature called appending.
Geometry node trees are just "data blocks" within the .blend file, which can be copied as needed.
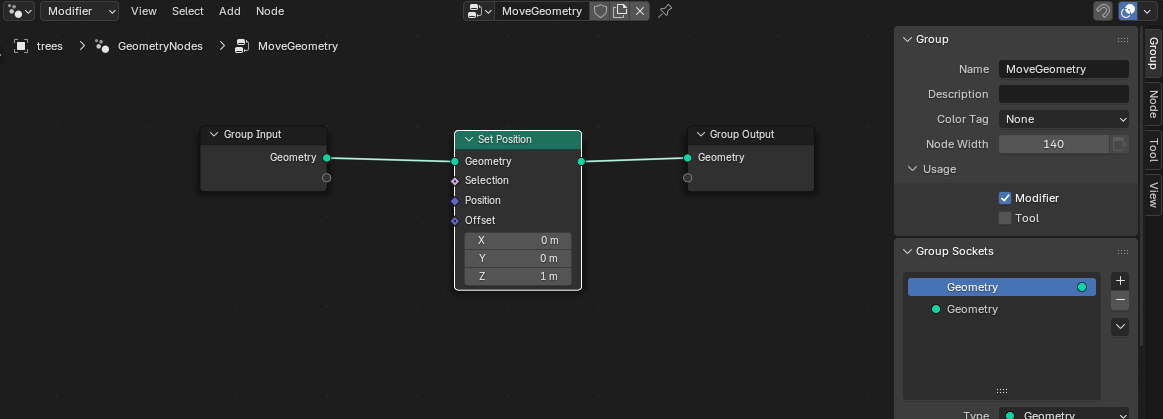
For example, if you save a geometry node modifier group:
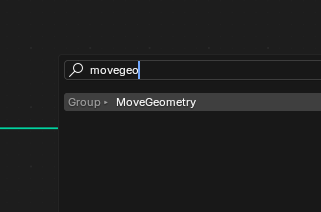
And you save this document to a .blend file, and open a new .blend, and use File -> Append and open the original .blend, you'll see in NodeTree that the geometry node group is there.


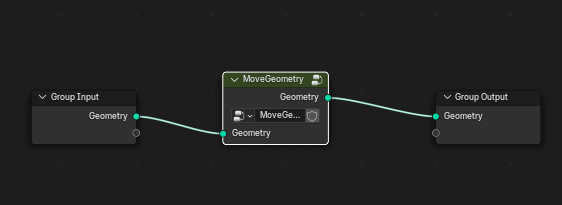
Now it is appended, you can use it as an isolated unit within a Geometry node tree:
The better way
Appending can be used in this way to do away with a lot of the tedious code when using Geometry nodes with the Python API.
You just need to do the following:
- Construct the geometry node tree in a
.blendfile (I usually keep each separate) - using the GUI editor - Save this file somewhere your script can access
- In the script, you programatically append the
.blendfile containing the geometry node tree, and so some minimal linking.
I prefer to keep all the modifiers in their own .blend file, and name the .blend file the same as the name of the modifier.
To append:
# Delete if exists already
if geo_nodes_name in bpy.data.node_groups:
    tree = bpy.data.node_groups[geo_nodes_name]
    bpy.data.node_groups.remove(tree)
blend_file_path = os.path.join(
    os.path.dirname(os.path.abspath(__file__)),
    "geo-node-files",
    geo_nodes_name + ".blend",
)
directory = os.path.join(blend_file_path, "NodeTree")
bpy.ops.wm.append(
    filepath=blend_file_path, directory=directory, filename=geo_nodes_name
)
To setup the modifier on the target object:
bpy.ops.object.modifier_add(type="NODES")
bpy.ops.node.new_geometry_node_group_assign()
modifier = target.modifiers[-1]
tree: bpy.types.GeometryNodeTree = modifier.node_group
# Clear any defaults
tree.nodes.clear()
Then some minimal setup is done: create an input and output node, link these to the appended geometry node group, and set any input values.
input = tree.nodes.new(type="NodeGroupInput")
output = tree.nodes.new(type="NodeGroupOutput")
node = tree.nodes.new(type="GeometryNodeGroup")
node.node_tree = bpy.data.node_groups["DeleteWhereDistanceGreaterThan"]
# If your group has any extra inputs, you could set them as follows:
# node.inputs[i].default_value = xxx
# Note, node.inputs[0] is the geometry itself.
tree.links.new(input.outputs["Geometry"], node.inputs["Geometry"])
tree.links.new(node.outputs["Geometry"], output.inputs["Geometry"])

# Apply the modifier (optional)
bpy.ops.object.modifier_apply(modifier=target.modifiers[-1].name)
And that's it - regardless of how many nodes you have in your tree (I have some very complex ones, that have about 20-30 nodes) - it is always exactly the same boilerplate linking.
Then if you ever need to modify the modifier, you just need to open the source .blend file and modify it, and save it.