Finding things in 3d models - unwrapping Metashape's fisheye distortion model
3 March, 2026
Introduction
As part of my Dirtscan project, I've been trying to implement a method that can detect (to then remove) things in a 3D model - particularly trees.
Up until now my approach has been very rudimentry: remove anything with a gradient greater than a certain angle. This works most of the time, because very rarely in a mountain bike trail is there anything tall that is not a tree.
Well, except for one thing: Wooden features
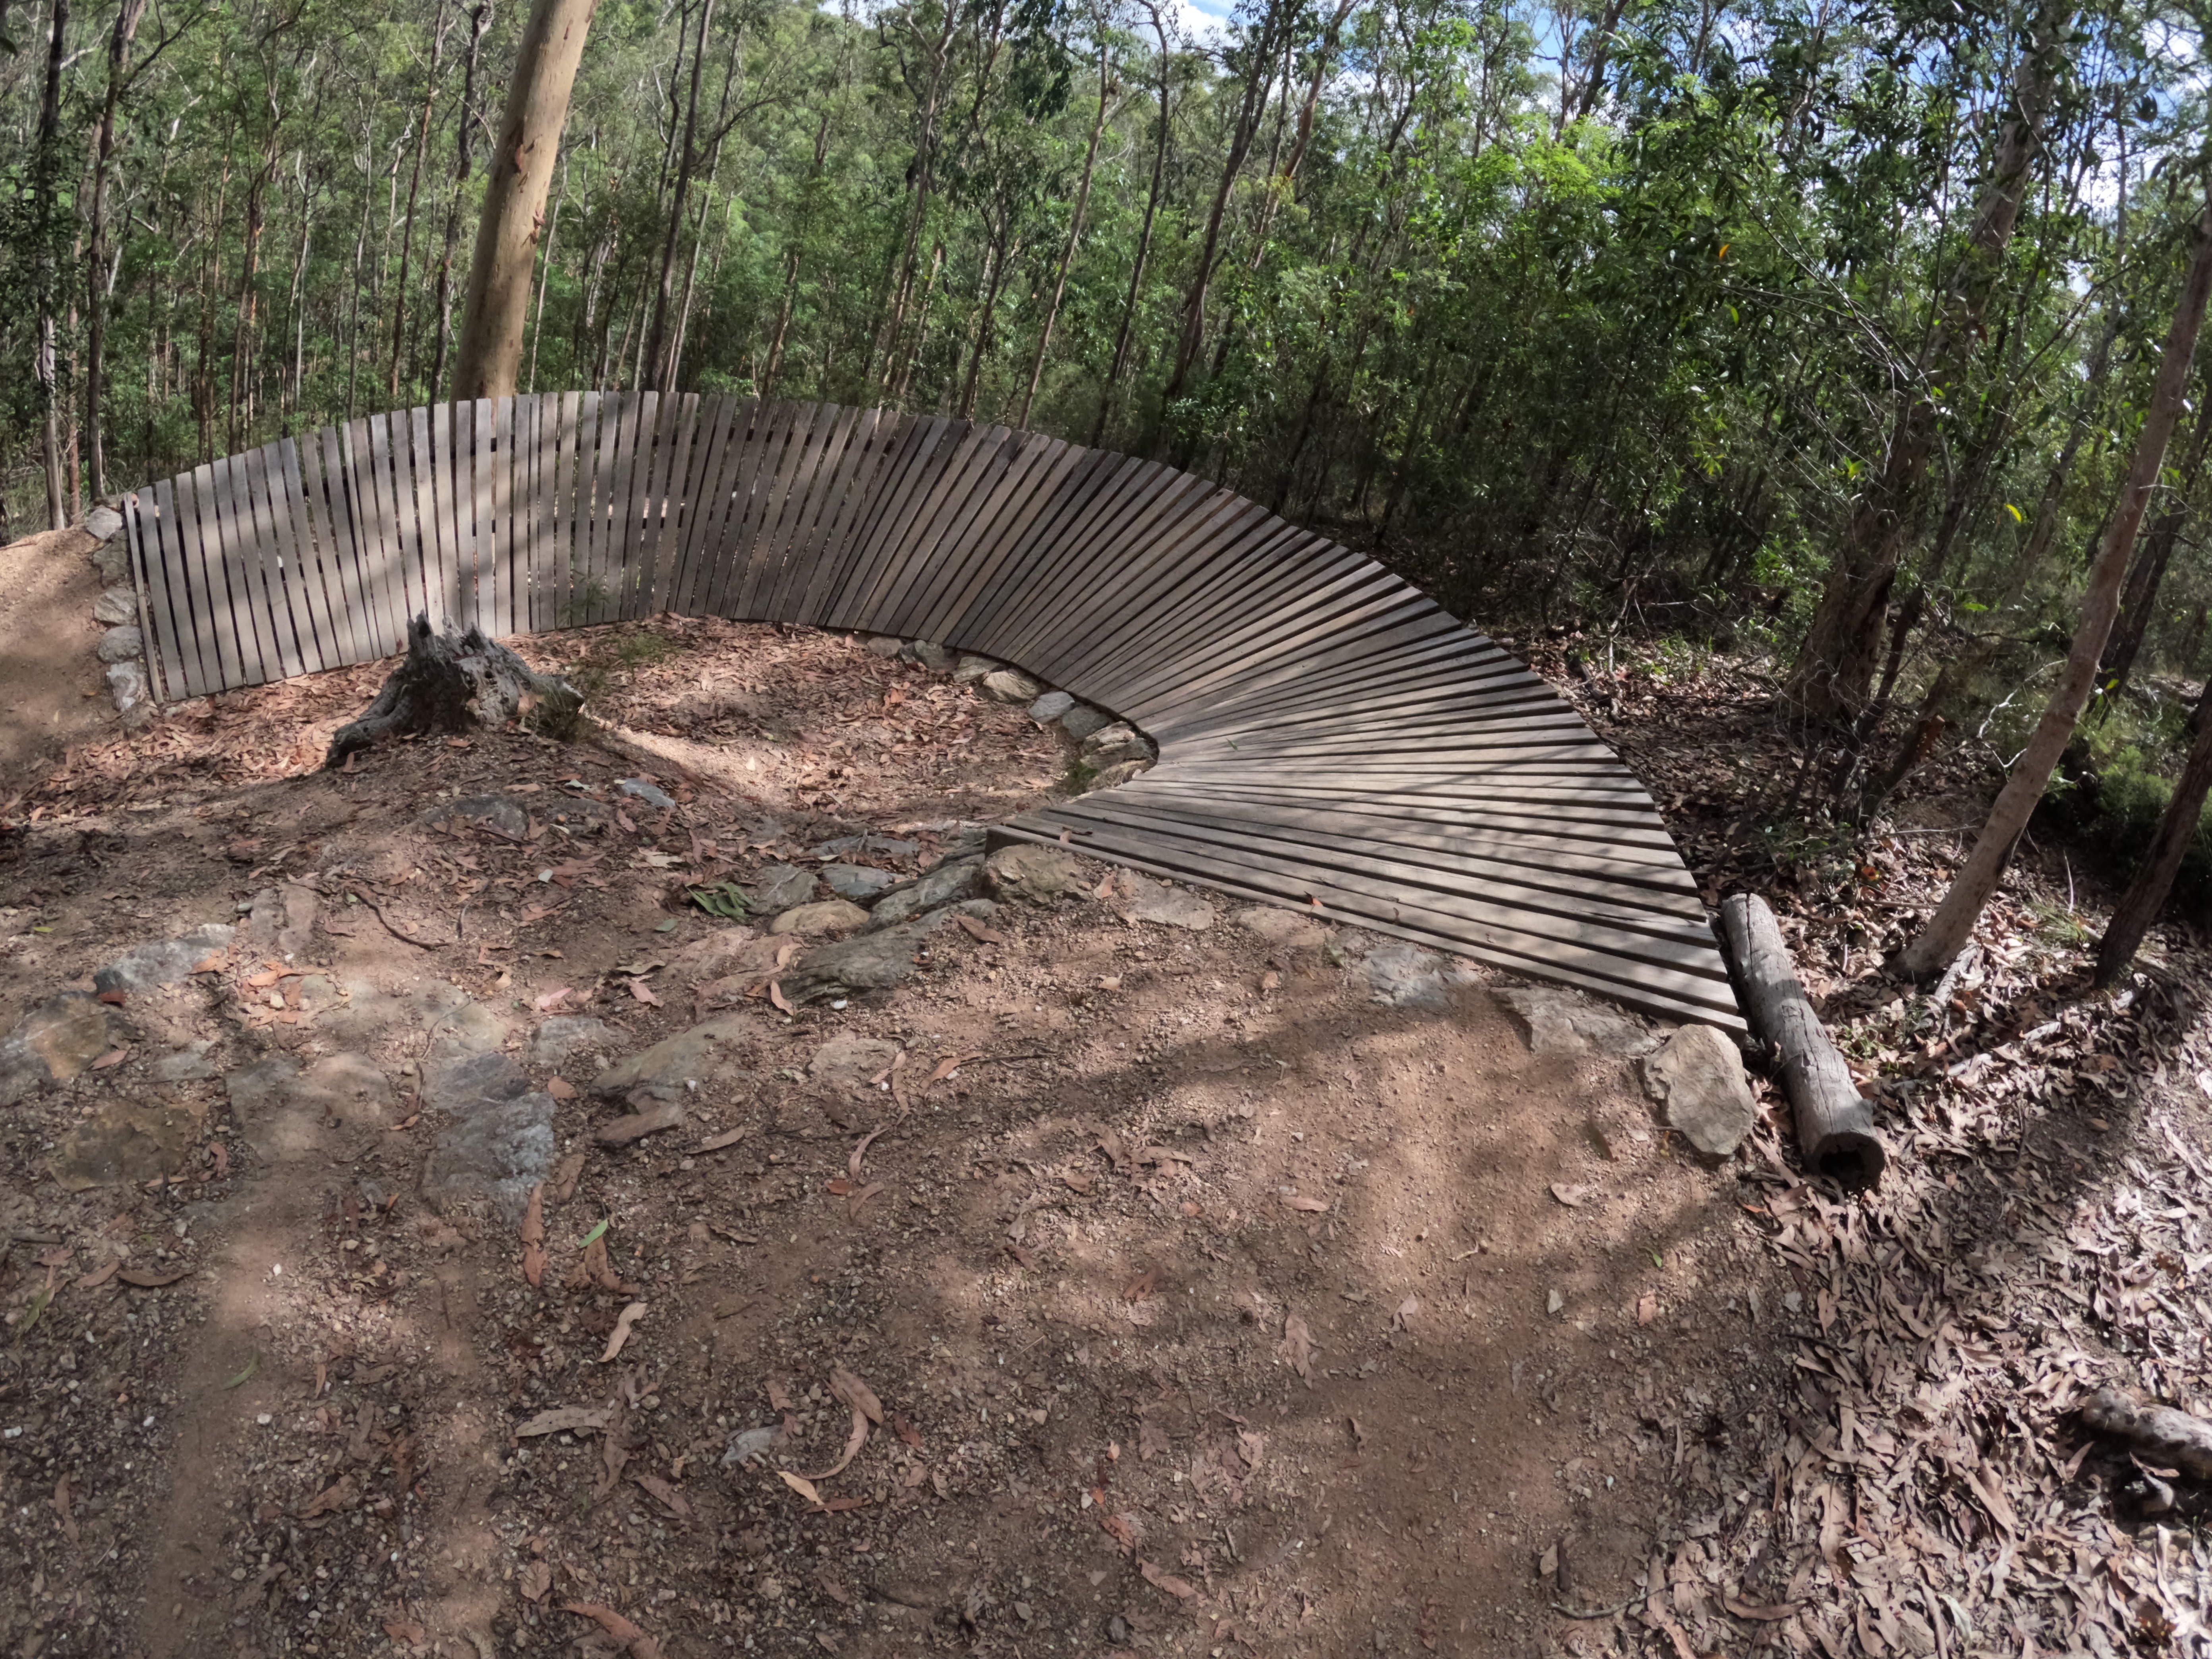
And if there is one thing I don't want to delete - it's these things. So I'm going to need a better solution.
AI (the cool kind)
Meta, known for both the loved (or hated, depends who you ask) React framework, and the (not very well received) Metaverse, luckily has a very good R&D department - with cash to go with it.
They have developed an image segmentation model, known as Segment Anything Model (SAM).
This model is exceptionally good at finding things. It's like magic. You just say "find the trees" and it finds them. But what is not magic is it's size: 3.4GB of pure weights and biases.
This is what it finds when asking for things like "trees", "logs" "wooden feature", "rock", "dirt path":
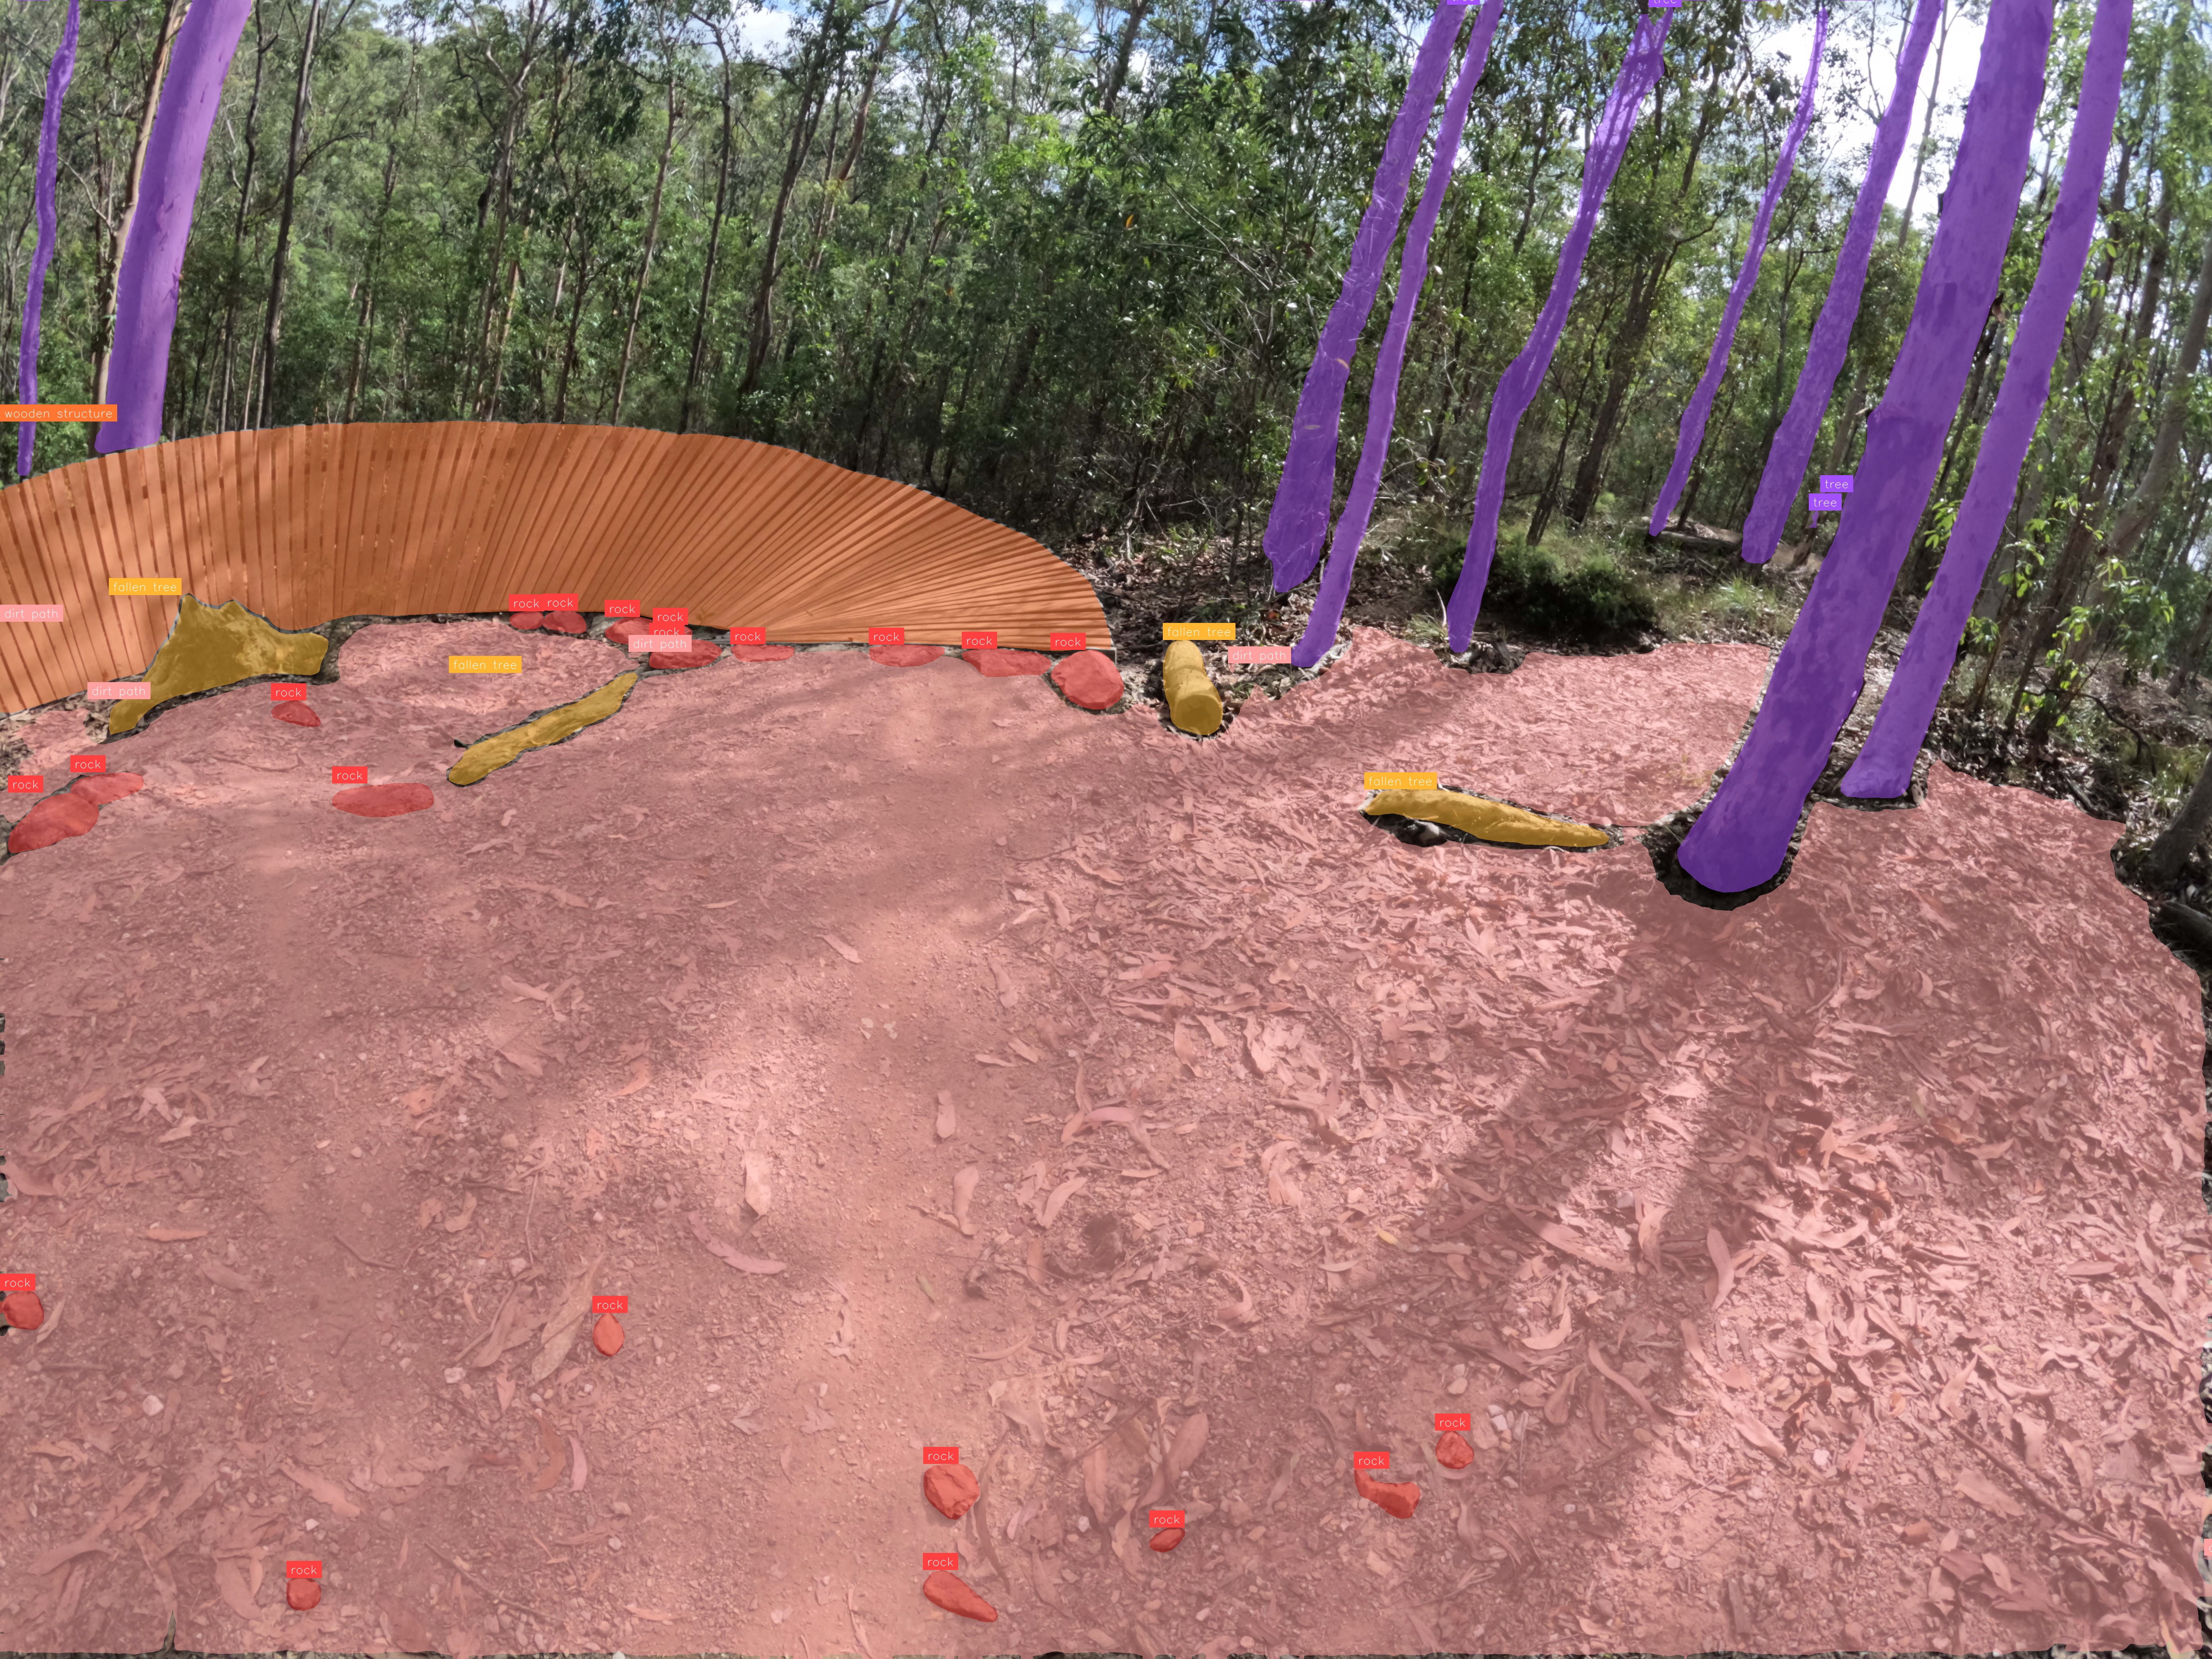
Encoded in those 3.4GB is a lot of things we don't care about. We care about trees, rocks, logs, wooden features. We don't care about cars, trucks, planes, and whatever else it's got encoded in there.
That's where a neat little trick comes in: Knowledge distillation
This is the process of 'distilling' knowledge from a larger model (like SAM3) and transferring a small subset of it to a smaller model.
In my case I'm not going to do it in the training loop, instead I'll use SAM3 to produce training data which I'll then use to train on a smaller model.
Since I'm stuck with my measly 3GB GTX1060 (nearly 10 years old!) it means I can't actually run SAM3 on my local machine. It's just too big. Some estimate it needs 32GB of VRAM. 32GB!!!
To do this, I utilised the VC-capital funded free credits on the AI platform Roboflow to train this instead.
Out of all the AI platforms, Roboflow is actually the nicest (and trust me, I tried a lot of them). They have a feature which allows SAM3 to bulk segment objects in images, and then to use this for training data for another model (in my case, RF-DETR)
The catch
So I can find objects in images - but images are not 3D models.
To recap, I use Metashape to generate 3D models from images, as it is the only photogammetry software at a reasonable price to handle fisheye camera lenses properly (as is the case with the GoPro I'm using).
Metashape allows you to export the camera locations, which are easy enough to use - they are just transformation matricies.
So, I know where the objects are in the photo and I know where the photo is. Therefore, it should be easy enough to get the position in the 3D world.
This is a process known as Raycasting - you have an origin vector, a direction vector, and you "cast" this like a ray of light until it hits something.
But it's not that simple because we're using a fisheye camera. Raycasting orthographic cameras are easiest, as there is no direction vector (literally, it's like raycasting a straight line). "Pinhole" cameras are next easiest, as they have an origin and a ray direction that is pretty simple to calculate.
So what about fisheye cameras?
Metashape, luckily, gives us the exact equation that is used internally to generate the 3D model. It's located in the user manual:
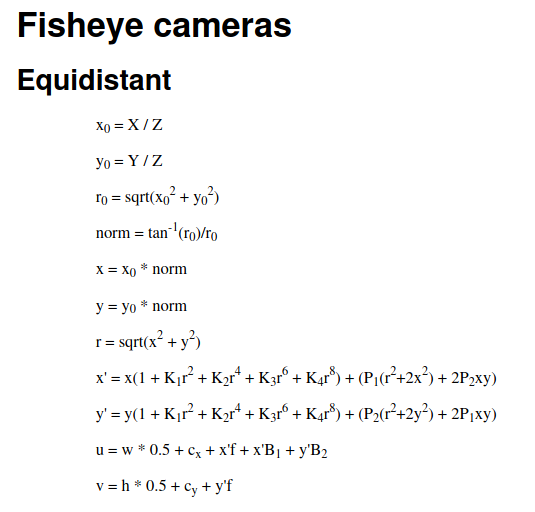
However, there is a catch. This is the forward equation.
I.e. the equation that gives us the camera to pixel transformation. We need the reverse: the pixel to camera transformation.
While it initially looks scary and complicated, we can rearrange it to make it simpler.
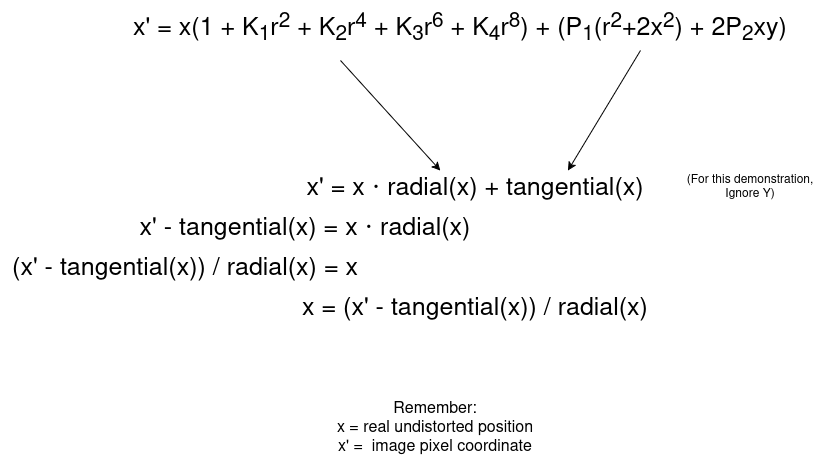
This gives an equation in the form x = g(x) (x' is known, it's the pixel coordinate)
Then using fixed point interation we can iteratively solve this, and it will converge onto the right solution. (This is known as Banach Fixed Point Theorem).
It took me a while to wrap my head around this theorem, but in simple terms it states: For particular equations (not all) where the result is less than 1 (i.e. they shrink), that from any starting position it will eventually shrink and converge onto the right solution.
In this case, we start at a best guess x (the distorted pixel coordinate) and iteratively apply the equation, and it will converge onto the undistorted coordinate.
The code looks something like this:
# Point is a (x,y) coordinate.
# Note, Metashape uses the CENTER as the origin, not the standard top-left - hence the subtraction of half the image dimension.
x_prime = (point[0] - width*0.5 - cx) / f
y_prime = (point[1] - height*0.5 - cy) / f

# Start at initial guess, the pixel coordinate.
x = x_prime
y = y_prime

# Iterate 10 times
for _ in range(10):
    r = np.sqrt(x**2 + y**2)
    radial = 1 + k1*r**2 + k2*r**4 + k3*r**6 + k4*r**8
    tang_x = p1*(r**2 + 2*x**2) + 2*p2*x*y
    tang_y = p2*(r**2 + 2*y**2) + 2*p1*x*y

    # Using the above, update the x and y.
    x = (x_prime - tang_x) / radial
    y = (y_prime - tang_y) / radial

# After iterating, x and y are very close to the actual solution.
We have the undistorted position now, but we still need to calculate the pinhole ray (that is, what direction/angle is it facing).
This is done as folows:
theta = np.sqrt(x**2 + y**2)

# Avoid divide by zero.
if theta > 1e-8:
    scale = np.tan(theta) / theta
else:
    scale = 1.0

x0 = x * scale
y0 = y * scale

ray = np.array([x0, y0, 1.0])
# Normalize
ray = ray / np.linalg.norm(ray)

# Flip axes, for Blender.
ray[1] *= -1
ray[2] *= -1

# Orient to camera
ray_world = transform.to_3x3() @ mathutils.Vector(ray)
ray_origin: mathutils.Vector = transform.translation
Note, Metashape uses Y+ up but Blender uses Z+ up, so some axes are flipped.
Confirming it works
Apriltag markers
I have taken a scan with 2 Apriltag makers and detected their locations in the fisheye distorted photos
Then, I raycast these positions in Blender, using the above code to undistort the pixel coordinate and calculate the ray. I then intersect all the rays to find the approximate intersection point.
This results in the following:
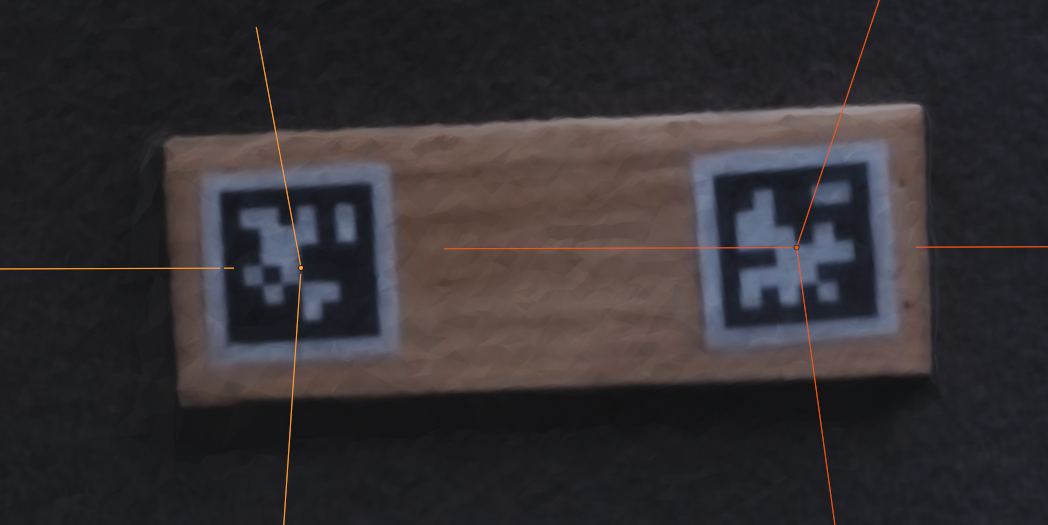
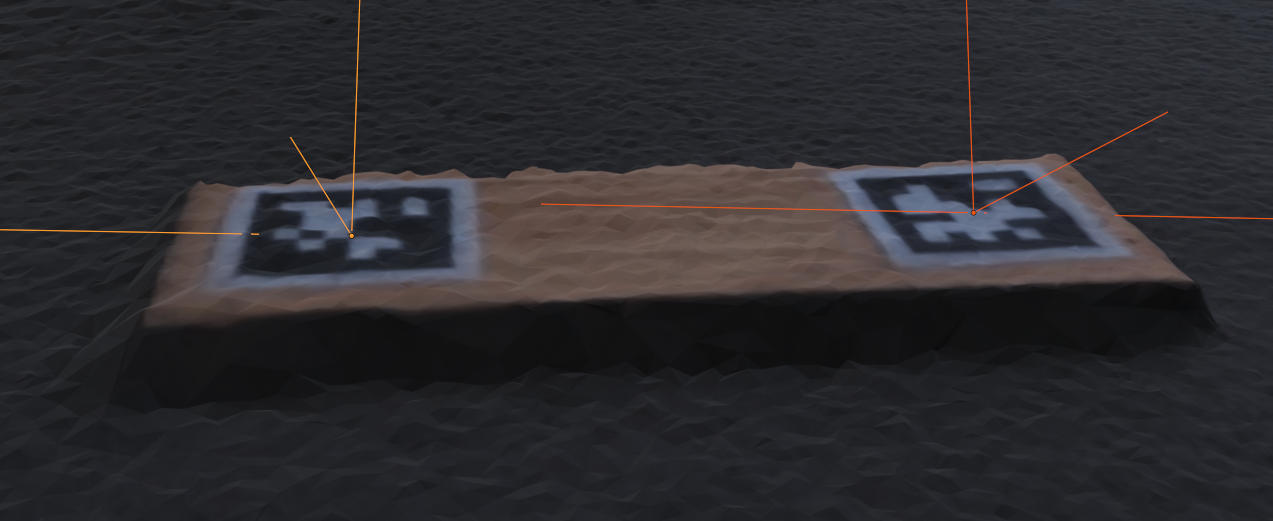
This shows that the positions are nearly perfectly accurate (some errors may come from Metashape itself, e.g. the camera transforms)
Raycasting contours
In this example, I have the image segmentation model find outlines in photos, and then I use Blender to raycast points within those outlines.
This results in the following, where it raycasts "tree" outlines:
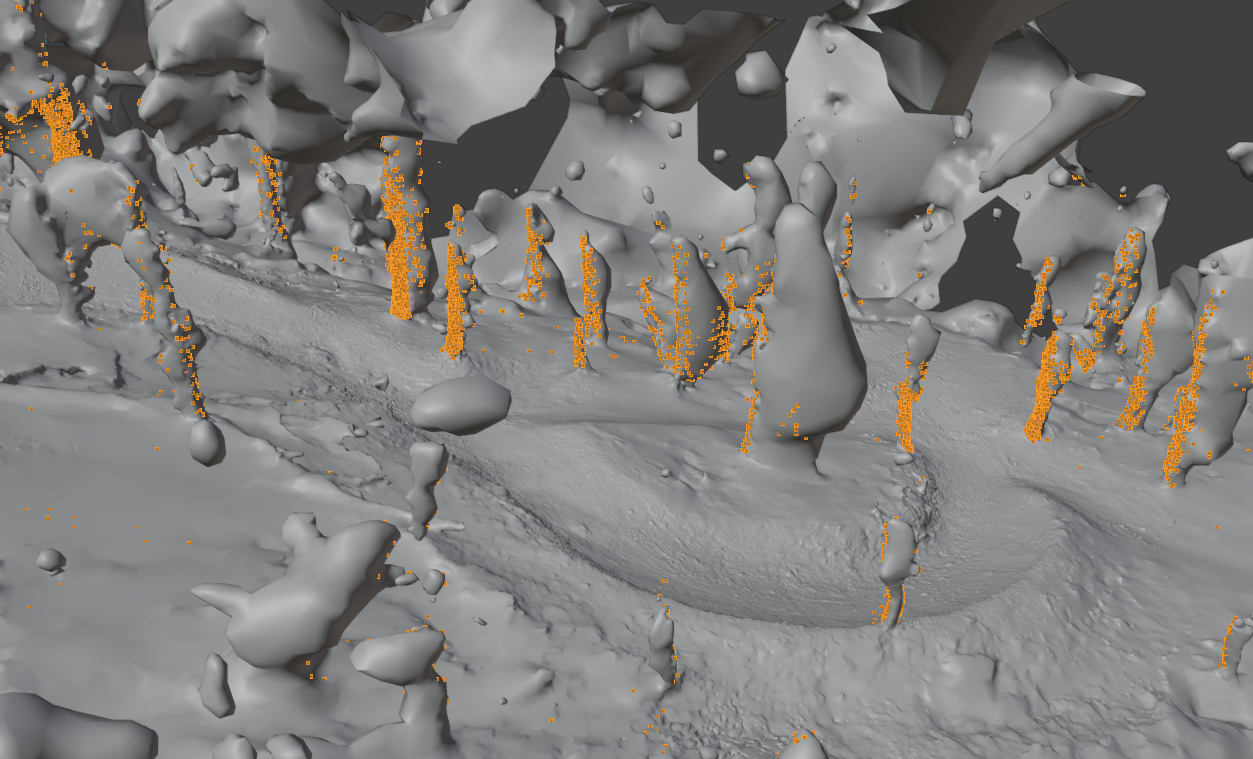
It's not 100% perfect, because the 3D Model is not always perfectly 1:1 with the images, but it's certainly good enough.